Showing posts with label pasta of the month. Show all posts

Wednesday, February 27, 2013

Healthy and Hearty Pasta of the Month - Orecchiette with Sausage


 Usually, healthy in the eating arena means a stick of carrot or celery.  Hearty describes a soup or stew!  But, when you can attest to losing weight while eating delicious pasta that is healthy and hearty,  I'll be the first one to "belly up" to the table.

Trust me on this one....Instead of using olive oil, this recipe called for chicken broth.  You can also use kale or chard, but I used spinach.  With the addition of fennel seeds, red chili flakes, garlic and mushrooms, I transformed this, otherwise bland recipe, into a quilt free feast!

Orecchiette with Sausage

2 cups orecchiette, little hat or ear shaped pasta

large pot of boiling salted water

about 4 links of sweet or hot Italian sausage (I used sweet but added red chili flakes for heat and spice)

5-6 mushrooms, sliced

3 garlic cloves, chopped

1 tsp red chili flakes

1 tsp fennel seeds

2-3 cups fresh spinach, chopped

1 cup fat free chicken broth

1/2 cup Parmesan cheese, grated


Method:

Cook the pasta in the boiling water according to the direction.

While the pasta is cooking, place the sausage which has been removed from the casing into a large skillet.  On medium heat brown and break up with a wooden spoon as you go.  Add the mushrooms, garlic, chili flakes, fennel seeds and spinach.  Stir until spinach is limp, for a few minutes.

Add the broth, scraping the bottom and sides of the pan to loosen all that flavor.  Cover and reduce the heat, cooking for a few more minutes (2-3).  Drain the pasta, add to the skillet and stir until mixed well.

This serves 4 servings of 1 1/2 cups each.  Sprinkle a bit  (1/8 cup) of Parmesan for one serving.  Enjoy!


Wednesday, January 30, 2013

Tivoli Inspired Lemon Pancetta Pasta - Pasta of the Month


I can't begin to explain how my first trip to Italy inspired me in the kitchen.  I was extremely impressed while on an excursion to the town of Tivoli which is a fortress of a town which was frequented in ancient times by the wealthy Romans.  After the main attraction, the Villa d'Este, we were treated to a pasta making demonstration by mother and daughter at the restaurant Terme di Diana.


Villa d'Este


Pasta making demo at Terme di Diana Restaurante


They made pasta the "old school" way which I still haven't mastered, but they made it look so easy, it was worth a try.  Since that first try I've resorted to using my trusty food processor, much simpler!  

The best recipe/method I've found happens to be Giada's fresh pasta on page 222 from her cookbook "Everyday Pasta".  I love her recipes!


When I make fresh pasta I'll usually make a few different types/shapes utilizing the whole batch.  Sometimes, it's ravioli, lasagna, fettuccine or, this time, spaghetti noodles.  Then I freeze whatever I won't be using that day.  For my Lemon Pancetta pasta I used approximately 6 "nests" of fresh spaghetti.  You can use about 1/2 pkg for the same amount.


"nests" of pasta


Tivoli Inspired Lemon Pancetta Pasta

5 "rounds" of pancetta, chopped

1 small shallot, sliced and chopped

2 garlic cloves, chopped

1/2 Tbsp red chili flakes

1 Tbsp of lemon zest

1 Tbsp of lemon juice

handful of fresh basil, sliced

ladle of pasta water (reserve before draining the pasta)

2 Tbsp butter

1 Tbsp olive oil

Parmesan cheese grated for garnish (optional)

While you boil some water for the pasta, put together the sauce.  If using fresh pasta, it will only boil for a few minutes versus 9-11 minutes.

For the sauce, in a large skillet fry the pancetta until it's done.  Reduce the heat to medium, add the shallot and continue to cook until soft.  Add the garlic and chili flakes, then the zest, lemon juice and basil.

Bring the pasta water to a boil, add a sprinkle of salt.  Add the pasta and stir to keep from clumping.  When it rises to the top, it's done, usually about 3 minutes or so.  Reserve a ladle of water, drain and place the pasta into the skillet.  Mix well and add the ladle, especially if dry, then the oil and butter, blending well.  Plate and serve.  Molto bene!


Saturday, December 29, 2012

Mushroom Tagliatelle - Pasta of the Month


With each attempt, I find that my pasta making skills are getting better and better.  Like anything else,  it's a learning process and practice makes perfect!  Nothing better than perfect tasting fresh pasta, silky soft ribbons of goodness!

This tagliatelle was an "after thought", that is, some left over dough from lasagna making.  I wanted to try out the tagliatelle/fettuccine setting, and this was the result.

big ball of pasta

lasagna noodles

nest of tagliatelle


 I used "baby Bella" mushrooms along with a bit of pancetta for a meaty flavor and chopped hazelnuts to add crunch.  Even if you're not going to use fresh pasta this dish should be wonderful!

Mushroom Tagliatelle

Serves 4

2 Tbsp olive oil

1/2 cup chopped pancetta, measured before cooking

1 shallot, thinly sliced

3 cloves of garlic, thinly sliced

5 Bella mushrooms (about 2 inches in diameter), thinly sliced

1 Tbsp butter

1-2 ladles of pasta water

1/4 tsp freshly ground nutmeg

1/4 cup chopped hazelnuts

Parmesan cheese for garnish (optional)

tagliatelle noodles for 4 people.  You can buy the "nests".  Use about 4-6 units.


In a large  (12 ") frying pan add 1 Tbsp of the oil and saute the pancetta.  Remove and put onto a paper towel to dry
.    
Add the other 1 Tbsp of oil, shallot, garlic and mushrooms and cook until mushrooms are slightly limp.

Meanwhile, start the water for pasta bringing it to a boil, then salt it.   If you're using fresh pasta it only takes a few minutes to cook, whereas dried will usually takes about 9-11 minutes.  Remember to reserve about 2 ladles of pasta water before draining.

Add the pasta to the pan with mushrooms, mixing well.  Add the butter and pasta water to make a "sauce", then add the hazelnuts and nutmeg, blend and plate.  Garnish with Parmesan if you wish.  Mangia!

Tuesday, November 20, 2012

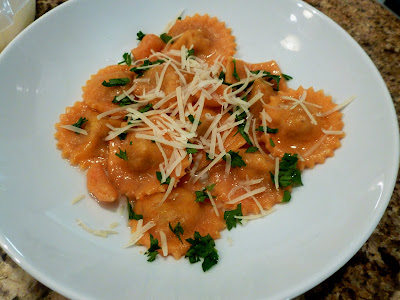
Ravioli Filling for Roasted Red Pepper Pasta


You would think that the remaining ravioli deep in my freezer were gold nuggets!  I will admit these were a little labor intensive (not for the beginner) since I made the pasta and filling from scratch.  If you're not feeling as ambitious it's okay to use wonton wrappers for your ravioli.  I've found that some chefs go that route, but because home made ravioli was on my "food to make" list,  I muddled through the process.

I won't post the actual red pepper pasta recipe until it is refined.  All I can say is that pureed roasted red pepper, an egg, oil, salt and copious amounts of flour were the ingredients.  Then came time to prepare the filling as I spread out, utilizing every corner of counter space.  

For the filling I used Italian chicken sausage, because that's what I had.  The recipe yielded about 3/4 cup of filling for approximately 100 ravioli (the smaller round size).  Was it worth the time and trouble to make these?  ABSOLUTELY!

Ingredients:

2 Italian sausages, removed from their casing and crumbled

1/4 cup onion, chopped

2 cloves of garlic (I had roasted garlic on hand)

1/8 tsp fresh grated nutmeg

1/2 tsp dried sage

1/2 tsp fennel seeds

1/2 cup Parmesan cheese, grated

1 Tbsp of an egg

In a skillet brown the sausage first with the onion and garlic if not using roasted.   Cool slightly and add to a food processor with all the remaining ingredients.  Pulse until blended well.  Fill your ravioli with the mixture.  

To freeze:  Put the ravioli on a parchment/floured sheet pan.  Place in the freezer for at least an hour and transfer to freezer bags.

To Cook:  No need to defrost from a frozen state.  For fresh add to rapidly boiling salted water.  When they rise to the top (usually about 2-3 minutes) they are done.

You can put your favorite topping/sauce but there was so much flavor from the red pepper pasta with the spicy filling I opted for simple olive oil and a sprinkling of cheese.  Enjoy!

Wednesday, October 17, 2012

Sweet Potato Gnocchi - Pasta of the month


I'm just a pasta making machine and loving every moment!  This ambitious endeavor has always been on my "bucket list" of things to do. If you're a cook like I profess to be, a trip to Italy will launch your cooking skills.  Inspiration is everywhere.  The fresh pasta and ingredients are in every trattoria, bistro or restaurant.  They even have amazing food at the auto strata eateries which look like a large 7-eleven from the outside but far, far from it as you enter.  So how do you savor the flavors of those places?  You make pasta!

My "pasta of the month" is sweet potato gnocchi from scratch.  To me, it's the starting point for pasta making.  If you can play with play dough, you can make gnocchi.  And there is nothing better than fresh pasta. This recipe makes over 100 little pillows of goodness.   I needed to use my new toy, a gnocchi board.  I'm still working on technique but with the right amount of pressure I'll have these babies looking machine made, perfetto (perfect).

Ingredients:

1 1/2 cups sweet potato 

2 cups flour + more for rolling and shaping

1 egg

1/2 tbsp salt for cooking water

Microwave the potato, skin and scoop out to measure.   Place chunks in a large bowl, mash with a fork or masher and cool a bit before mixing with flour.

Stir in the flour 1/2 cup at a time until the dough forms.  You may not need all the flour.  The dough should be soft. 

Now stir in the egg and mix well.  If it's on the wet sticky side, add more flour (1/2 cup or so).  Divide the dough into 4-6 pieces. On a surface sprinkled with flour,  roll each piece like you're making a long snake about 1 inch in diameter and as long as the dough will take you.  Then cut into 1/2 inch "pillows" (pieces).   If you happen to have a gnocchi board lying around use it to make the ridges.  A fork can do the same thing or you can leave them without the ridges (more rustic)  As you make each piece place them on a pieces of parchment paper on a baking sheet or surface.  Repeat the gnocchi making until the dough is gone.  I estimate that you'll have well over 100, possibly around 120!!


roll and cut


form with board


ready to freeze or cook

You now have the option of freezing them for a later time.  Just place the gnocchi filled baking sheet directly into the freezer for about an hour or two.  When frozen you can put them in freezer bags.  It will take slightly longer to cook the gnocchi in a frozen state and no need to defrost.

To cook that day:  Bring a large pot of salted water to boil.  Put the gnocchi in but don't crowd them.  When they rise to the top (usually in 1 minute or less), they're done.  You can do this in batches.  Have the melted butter or browned sage sauce waiting in another pan or pop into a warm oven as you make more.

When it comes to how many per serving....how hungry are you?  Between 15 and 20 is a sizable portion!  I guarantee that these will melt in your mouth!


Sunday, September 30, 2012

Pasta of the Month - Spaghetti con Pomodoro e Vongole


Times flies by so quickly these days.  I realized I hadn't posted my "pasta of the month" for September.  This recipe is a combined approach to a simple pomodoro (tomato)  along with clams (vongole).  My tomatoes have been producing in spurts so linguine with clam sauce needed to become more accommodating.  All in all it was a great "marriage" of flavors.

What?  No picture of the finished dish?  That is so unlike me.  Anyone knows they can't eat without "the picture" being snapped!  Oh well, we must have been awfully hungry, but it was a pretty site and it tasted quite good!

Ingredients:

1/2 lb. of spaghetti

2 Tbsp olive oil

3 green onion, chopped

3 cloves of garlic, peeled and roughly chopped

2 cups fresh tomatoes. I used my "early girl variety.

1/4 cup chopped fresh parsley

2 cans (6.5 oz) chopped clams in juice.

2 Tbsp butter

Start the pasta water, bringing to a boil, add a bit of salt and the spaghetti.  Reduce the heat and cook according to directions, usually around 9-10 minutes.  Reserve some of the liquid before draining.  You may need it later.

In a large frying pan heat the oil on medium heat, toss in the onions and cook for 2 minutes.  Add the garlic, cooking for only a minute.  Add the tomatoes, parsley, and the clam JUICE only.  Cook for a few minutes while stirring.  Add the clams and only cook for about 2 minutes.  

Toss the pasta into the skillet, blending well.  Add the butter and a ladle of pasta water.  Plate and garnish with Parmesan if you wish.  This is a super quick meal! 

Tuesday, August 14, 2012

Israeli Couscous - Pasta of the Month


You would think at my age (and I'm not telling!), I would already have sampled this pearl couscous!  But, grocery stores don't resemble what they were 20-30 years ago.  Food was so blah back then.  A slab of meat, potatoes or rice and a few steamed vegetables usually appeared nightly on the dinner table.   If you wanted a certain ethnic food, you might be able to get some tortillas and a can of refried beans!   Seriously!   Now, as I cruise the isles I'm open to trying  just about anything for variety.  It is the spice of life, right?

Israeli couscous is a type of pre-roasted pasta shaped like a small pearl.   I first tried it in a store bought Trader Joe's salad.  It looked interesting, why not!   Like regular couscous it lends itself to experimentation.  Hot or cold, alone, with olive oil or an assortment of veggies, the variations are endless!  These are the type of meals I like!

Ingredients

1 cup pearl couscous

1 1/4 cups water

1/2 cup or 2 green onions, chopped

1/8 cup currents or raisins

1 Tbsp lemon zest

1 loosely packed chopped fresh arugula or spinach

1 Tbsp lime or orange juice

pinch of salt

1 Tbsp olive oil

1 cup parboiled chopped broccoli

1/2 cup raw cashews

In a pot, place couscous and add boiling water.  Cover and cook on low heat for about 10 minutes until done.  Drain and rinse with cold water.  Add the remaining ingredients except the cashews and mix well.  You'll add the nuts after chilling in the refrigerator for 1-2 hours, at least.   This is a great side dish for a picnic or brunch.  You can make it ahead, even the day before.

NOTE: If you like your veggies cooked, throw them in a pan and saute a bit before adding to the couscous.

Saturday, July 28, 2012

Farmer's Market Pasta of the Month


For most of the gardener's out there, you probably have some of these ingredients at your fingertips.  My first crop of beets didn't do very well, so I planted more.  We'll see how they do.  As for my arugula, wow, quite the crop!   With the recent heat, it's on its way out (going to seed), but I was able to scrounge enough for this pasta.  The rest came from the local (actually from Oroville, California) farmer's market.  You can use spinach or chard instead of arugula, however, the peppery flavor of the arugula  was a nice addition. 

I've found that some of my best pastas are the "rustic" ones.  Don't be afraid to try different combinations of veggies.  And if you're a gardener, now is the time to start experimenting!

Ingredients:

2 cups bow tie pasta

2 Tbsp olive oil

2 cups chopped fresh arugula

2 cups beet tops, chopped and stems or ribs removed if not extremely fresh

4 cloves garlic, chopped

2 Roma tomatoes, seeded and chopped

salt and pepper to taste

2 ladles of reserved pasta water

1 Tbsp butter (optional)

Start to bring some pasta water to a boil, adding a pinch of salt after it starts to boil.  Cook pasta according to directions.  Meanwhile, add oil, arugula and beet tops to a large skillet.  Saute until they start to wilt.  Add the garlic, tomatoes and salt and pepper and cook for a little while longer (5 minutes).  

Drain the pasta reserving some liquid.  Put the bow ties into the skillet and stir.  If it's on the dry side, add some of the pasta water, butter and/or a drizzle of olive oil, stirring to mix.  Garnish with freshly grated Parmesan, if you wish, and serve.  Mangia!  So good!   

Thursday, June 21, 2012

Pasta Carbonara - Pasta of the Month


I don't know about you, but I look forward to my "pasta of the month post".   Frankly, I could make and eat pasta every day, if allowed.  My waistline does not permit me to indulge in such comfort food!  In my next life, I need to come back as an Italian living in the coastal regions of "the "boot".  That way I can have the best of both worlds, seafood and pasta, with an occasional pizza thrown in!

I'm surprised I've never made this classic dish sooner.  It comes together in about 20 minutes and is decadently good.  The thought of beaten eggs whisked in at the last minute scared me a bit, but so does the raw eggs in caesar salad dressing!  And there's always sushi, but I won't go into those stories!

I adapted this recipe from the Food Network.  I'm not a bacon in the morning  person (unless swirled into chocolate ice cream), so I used panchetta, not that it matters much.  They are still practically the same except for the way they are prepared and cured.  This is a great pasta dish.  It deserves more recognition!

Pasta Carbonara  (2 large servings, can easily be doubled or tripled)

1/2 cup chopped panchetta

1 Tbsp chopped garlic

black pepper

approx 1/2 lb spaghetti or fettucine, cooked

2 large eggs, beaten

salt (if you must, but not necessary with panchetta)

1/2 cup Parmesan or Romano cheese, grated

1 Tbsp chopped Italian parsley

On medium heat, in a large saute pan, cook the panchetta with a drizzle of olive oil until crisp.  Remove from the pan and drain on a paper towel.  Use about 1 1/2 Tbsp of the oil from the panchetta and toss the rest.  Add the garlic, then the pepper, only cooking for 30 seconds, or so.  Add the panchetta back in and the drained pasta.  Cook for another minute, while stirring.  Add the salt to the eggs.  Important:  Remove the pan from the heat and add the eggs, whisking briskly until the eggs thicken, being careful that they don't scramble.  Add the cheese, stir and garnish with the parsley to serve.  Very tasty!!  You can almost transport yourself to Rome with this one!  Enjoy!


Entrance to the Vatican

Friday, May 25, 2012

My Signature Pasta - Pasta of the Month


I guess it's no longer a secret, huh?  This recipe goes back to 1997 or so, when my son had relocated to Monterey California.  We went to visit for Easter and took him out to a quaint restaurant (name unknown, darn it) which was housed in an old Victorian home.  Each room had a few intimate tables, service was great as was the food.

I love pasta but didn't want the "red sauce" kind.  The dish I chose was a penne pasta with simple garlic, spinach, mushrooms and pine nuts.  Perfect!  As I devoured it, I secretly "picked it apart" ingredient by ingredient so I could replicate this at home for my family.  Job well done, she says!   It's my "go to" signature pasta now.  I can probably make it in my sleep!

Ingredients:

2 cups dry penne pasta

2 Tbsp olive oil

1 large garlic clove, minced

1/3 yellow onion, sliced

3 cups spinach

7-8 mushrooms, sliced

1/2 cup raisins

2 handfuls of pine nuts, toasted or not

2 ladles of reserved pasta water. extra drizzle of olive oil

Parmesan cheese for garnish (optional)

Boil water for the pasta.  Meanwhile, in a large skillet, saute the onions first.  Add the mushrooms, garlic and spinach and cook until spinach is limp.  Add the raisins, then the cooked pasta, remembering to drain and reserve some water.   Add the pasta water to moisten, the extra drizzle of olive oil and pine nuts.  Stir well and serve.  Great left over, too!

NOTE:  Sorry..no picture.  I'll post it next time I make this wonderful pasta!!

Friday, April 20, 2012

Artichoke Baked Rotini - April Pasta of the Month


Because I'm ALWAYS trying to eat right and better, I opted to make a pasta dish with whole wheat pasta.  I've tried several brands over the years and most brands  never "turned me on".  So, either my tastes are changing or the food companies are improving their alternative pastas.    Instead of it tasting healthy (dry and unappealing) this pasta had a nice nutty flavor to it.  Of course, it helps when you add cheese!  Everything tastes better with cheese!

My artichoke baked rotini is also meatless, so I'm already headed on the right track to better health, right?  You can prepare it ahead of time and bake at a later date....for company.  But, it doesn't take long to throw it together for your family during the week!

Ingredients:

2 cups whole wheat pasta (dry)

boiling pasta water

salt and pepper

1/2 chopped or sliced onion

2 garlic cloves, chopped

1 handful of basil, chopped

1 roasted red pepper, chopped

1 12 oz bag of artichoke hearts (frozen Trader Joes are excellent)

1/3 cup bread crumbs, seasoned

4 oz mascarpone cheese

1/3 cup Parmesan cheese, grated

Preheat oven to 375 degrees.  Boil water for pasta and cook rotini until al dente.  Drain, reserving some pasta water for later, and set aside in the large pan.

In a large skillet, saute onion in a little olive oil and then add the garlic, red peppers, basil, artichokes  and cook together for about 5-6 minutes.  Add the skillet contents to the pasta along with breadcrumbs, mascarpone and most of the Parmesan.   Mix well,  salt and pepper to taste.  You may need to add some of the pasta water to get a creamier consistency.   Pour into a 9x13 baking pan.  Sprinkle with more Parmesan.   Cook uncovered in the oven for about 20 minutes.  You can add more mascarpone for a creamy pasta, but it was nice the way it was.  Enjoy!

Wednesday, March 28, 2012

Margherita Pasta - March Pasta of the Month


Time flies when you're having fun!  I almost let March slip by without posting my "pasta of the month".  I don't think there's a classic dish that takes the popular margherita pizza and transforms it into a pasta plate.  But, in my kitchen, anything goes!   The pizza's origin comes from Queen Margherita of Italy.  On a visit to Naples she was served this pizza depicting the colors of the Italian flag, red tomatoes, green basil and white mozzarella.  It works for me!

I love the simplicity of a few basic ingredients, thrown together to mimic the flavors of pizza minus the crust.  Since this was an experiment, I'll recommend some changes.  Use ALL fresh ingredients if you can, especially a soft mozzarella.

Margherita Pasta

2 Tbsp olive oil

2 cloves garlic, minced

1/2 onion, chopped (optional)

a big handful of fresh basil, chopped

1 - 1 1/2 cups tomatoes, cut or use cherry tomatoes

4-6 oz mozzarella, cubed

pasta of choice

pasta water, 2 ladles

red chili flakes (optional)

Heat oil in a large skillet and saute garlic, onions and tomatoes.  Meanwhile cook the pasta reserving some pasta water before draining.    After draining add the pasta, fresh basil and pasta water to the skillet.  Mix well and throw in the mozzarella, mixing again.  Then serve.  Super simple, but tasty!  Sprinkle red pepper flakes on top  because I love those on my pizza!

Saturday, February 11, 2012

Pasta of the Month - A for Artichokes


This pasta has everything you need.  A little crunch from the walnuts, an earthy goodness you get from the garlic, cheese and sun dried tomatoes and the main ingredient, artichokes.  Originally from California, I grew up on artichokes.   My mom used to stuff the leaves with a combination of raisin bread and Roquefort cheese.  So good.

When my husband and I moved to Colorado, (we lasted only 13 months) finding fresh artichokes were difficult.  I remember, at the checkout, the checker asked what they were and how did I cook and eat them.  I assumed everyone knew what an artichoke was.

Living in Nevada, artichokes are "like a box of chocolates, you never know what you're gonna get"!  It seems that sometimes they're flavorful and other times they're dry and tasteless!  So, to still get my dose of artichokes without the guessing games, I resort to canned or frozen when they aren't in season.  This is one of those "keeper" recipes that I'll make over and over.

Ingredients: (4-6 servings)

1/2 box or 1/2 lb pasta (I used bow ties or farfalle)

1/2 cup sun dried tomatoes, sliced

3 cloves of garlic, minced

1/4 cup olive oil

 12 oz bag of frozen artichokes, cut up.

1/2 cup walnuts, toasted or not, coarsely chopped

2 T fresh basil, chopped

a dash of red chili pepper flakes

2 ladles of pasta water

1 cup Parmesan cheese, grated

Boil water for the pasta in a large pot.  In a large skillet, saute the garlic, sun dried tomatoes, red pepper flakes, and artichokes in 1/2 of the oil.  Continue to cook on medium heat until the artichokes are cooked through.    When the pasta is cooked, reserve 2 ladles of water and drain.  Add the pasta and pasta water to the skillet.  Add the basil, cheese and the remainder of the oil.  Stir well and serve with the walnut garnish. (you can mix a few of them in, too)  Optional:  a squeeze of lemon and a drizzle of olive oil before serving is good, also!  Enjoy...this is an easy one.

Thursday, January 12, 2012

Pumpkin Gnocchi Perfection - Pasta of the Month


This is one awesome recipe I can't take credit for.  Well, maybe just a little.  My talented son, Jeremy, was the chef who whipped this up for his jetlagged and weary parents.  We had just returned from our vacation in Hawaii bearing gifts of Kona coffee and cookies and welcomed the chance to see him and his lovely girlfriend, Leilani.

My son can make a gourmet meal from literally nothing or a few items he may find lurking in the pantry or refrigerator.  He's had the "restaurant background" from his past waiter jobs, and puts his expertise into action over my stovetop.  Guaranteed, he would be a worthy contender on that food network show where they give you 3-4 unrelated ingredients and you must transform them into something edible!

So, the pastas of the month for January is (drumroll, please) Pumpkin Gnocchi ala J.D.

Ingredients:

3 Italian sausage links, removed from casing and crumbled

4 garlic cloves, minced

olive oil, about 1-2 Tbsp

1 acorn squash, roasted and cubed

heavy cream , 1/8 - 1/4 cup

parmesan cheese, handful

pumpkin gnocchi, 1 package = four adult servings.  Or you can use plain gnocchi or even make your own.

pinenuts for garnish

In a large skillet, brown the sausage in the oil and remove when done.  Add the garlic and acorn squash and saute for a few minutes.  Meanwhile, bring a pot of water to boil (for the gnocchi).  Cook the gnocchi according to direction.  They are done when they rise to the surface (not very long). 

To the skillet, add the sausage back in and then the heavy cream, stirring.  Add the gnocchi and parmesan.  Mix and plate, garnishing with the pine nuts.  A simple dish with earthy goodness!  Thanks, my wonderful son!

a closeup of perfection

Saturday, November 26, 2011

Sunday Gravy for that Pasta of the Month


A little over one year ago, I vowed to come up with a bolognese sauce that would rival the one that Zeno made for us in Costa Rica.  Of all places, I had the best lasagna I had EVER tasted in the coastal town of Tamarindo.  As I savored each bite I tried to "pick it apart" and make a mental note of the ingredients.  I probably should have just asked for the recipe.  But, as some of you know, some of the best cooks do not rely on a recipe.  And if you are lucky enough to receive the recipe, chances are a key ingredient has been conveniently (of course, not intentional) left out!

So, a few months ago, I came up with another attempt for the best bolognese sauce.  Although it was tasty, I can still improve on this.  Maybe next time some tomato paste to thicken it up and perhaps some more meat, even  panchetta? 

For now, this will have to do.  This recipe made enough sauce for several meals, so you can package it into 2 cup servings, or so, and freeze until you need it.


Zeno's lasagna...my inspiration

Eggplant with bolognese sauce

Sunday Gravy

1/4 cup olive oil

1 lb mild Italian sausage, removed from casings and crumbled

1-2 veal chops

3 cloves of garlic, crushed

15 oz. tomato puree

28 oz tomato sauce, plus 1 can of water

28 oz whole peeled tomatoes, hand crushed

large handful of fresh chopped parsley

large handful of fresh chopped basil

1 tsp fennel seed

1 tsp red pepper flakes

1 tsp oregano

In a large stock pot, brown the sausage in the olive oil.  Remove from the pan and set aside.  Now, brown the veal chops and set aside.  Throw in the garlic through the oregano ingredients. Stir and cook for about 30 minutes.  Add the meat back in and at this point I added 3/4 cup of pork tenderloin chunks.   Bring to a boil, cover and reduce the heat to simmer for about 5 hours or longer.  The meat should be falling off of the bone.  Remove the veal bones and shred any big pieces. 

Serve over your favorite pasta.  Enjoy!

Thursday, October 13, 2011

Italian Stuffed Shells - Pasta of the Month


It's that time again, pasta of the month - October.  I couldn't let the day pass without honoring my hubby with this great meal.  Happy Birthday, my man, and many more.

Creme brulee in Italy 5 years ago!

 
Truth be told this is not his birthday dinner.  It came from the archives of "not posted yet".   This amazing stuffed shells recipe is a special dish you can serve to your guests! 

  When I was a working girl, I confess, I actually had these delivered to my door from a frozen food supplier.  They were good, but not exceptionally good like homemade.  I thought these would be time consuming, but if you use prepared sauce they are relatively easy and quick.

Let's pretend I used ready made sauce from a jar.  (I didn't, but it's not a bad idea to streamline the recipe..)  Therefore, I won't give you the sauce recipe, this time...still working on the perfect marinara/bolognese sauce!  I promise, you will impress your guests as this dish comes out of the oven all cheesy and bubbly!

Ingredients:

about 3 cups of sauce (your choice) HINT: I used to saute Italian sausage and garlic to add to the store bought sauce

about 16 large pasta shells

For the filling:

2 Tbsp olive oil

1 handful chopped Italian parsley

1/4 cup chopped onion

1 cup thinly sliced mushrooms

1 1/2 cup cubed eggplant

2-3 basil leaves chopped

ricotta cheese (15 oz container)

1 egg

1/2 cup Parmesan cheese, grated

For the topping:

1 handful chopped parsley

1 cup grated mozzarella

Preheat the oven to 400 degrees.  Boil water for the pasta shells, salting it as it starts to boil.  Cook them according to directions, al dente.

In a skillet, heat the oil, add onion,  mushrooms and eggplant and cook until soft.  In a bowl put the ricotta, basil,  parsley and eggplant mixture.  Add the egg and Parmesan and mix well.

Stuffed and ready to bake

Drain and cool the shells and stuff with the mixture.  In a 9x11 baking dish spread about 1/2 cup of sauce on the bottom.   Place the shells in a baking dish and  pour the remaining  sauce over the top, then add the mozzarella cheese and additional parsley.  Bake for about 25 minutes, allow to cool slightly and serve.    This dish will freeze well before the cooking process so you can make days ahead and enjoy your guests!

Cheesy and Bubbly!!  Yum!

Friday, September 23, 2011

Pasta of the Month - Hungry Man Orzo


As September is flying by I realized I haven't posted a pasta recipe in a long  while.  Could it be that it's not on my list of "allowable foods"?  Probably,  because not much of what tastes good is on that list!   Pasta,  along with bread and sweets is my Achilles 's heel.   But, if you love egg whites for breakfast, you'll fit right into this "protocol".

Getting a meal on the table these days takes alot of creativity and planning.  I find I just can't resort to a slab of white chicken breast, lettuce and a cup of veggies, plain.  It's not in my nature to eat bland food!  The other night I was able to have a steak (something I don't usually eat much of) along with my lettuce, whoopee!  For a side dish I literally threw hubby's orzo together at the last minute.  No sense in subjecting him to my way of starving eating!

I didn't make a very large portion (serves 2 or 1 hungry man).

Ingredients:

1 garlic clove, minced

1-2 Tbsp olive oil

1 Tbsp sliced shallot or onion

handful of beet tops (or spinach)

4 button mushrooms, sliced

a handful of fresh from the garden tomatoes, preferably Romas

1/2 cup orzo

reserved pasta water

Parmesan for garnish

In a heated skillet, cook shallot until limp, a few minutes.  Add the garlic beet tops, and mushrooms.  Meanwhile boil water for the orzo.  You can salt the water after it boils, add the orzo and cook according to directions, usually about 10-11 minutes.  Reserve some pasta water before draining,  Once drained add the orzo to the skillet along with the tomatoes.  Stir completely, adding a ladle or so of water to moisten.  And maybe, a drizzle of more olive oil.  Then serve.  Hopefully this was good for hubby...I was too busy scarfing down my lettuce!  Enjoy!

Thursday, August 18, 2011

Panzanella Penne - Pasta of the Month


The last couple of days have been spent putting my home back together.  With the kitchen remodel comes alot of fine particle dust in every nook and cranny, shelving cabinets and pantry, juggling food from one refrigerator in the garage to the new one.  I'm sure I have the longest hallway to the garage, or it seems that way.  I must have made 50 trips, there and back.  But, the kitchen is really looking great!

As I mentioned, we were invited to dinner at Paul & Cathie's Resort. (That's what we call it because it's absolutely gorgeous, evoking a calming resort-like feeling.)  We had a bit of rustic garlic and olive ciabatta type bread  which was left over, so I snagged it to create this pasta of the month for August.

I even made it more rustic by cooking this dish in the gourmet garage on one hotplate. (not recommended but doable!!)  To further the Tuscan experience, I air dried the bread slices, then cubed them.  Thanks, Nevada, for your lack of moisture.  You almost don't need a toaster in this part of the country!

Panzanella Penne

1-2 Tbsp olive oil

1/2 cup red onion, sliced

1/2 cup mushrooms, sliced (optional)

1 cup cherry tomatoes

1/2 fennel bulb, sliced

2 garlic cloves, cut finely

2 Tbsp butter

1 - 1 1/2 c any rustic Tuscan bread, cubed

1/2 box of penne pasta

 about 2 ladles of reserved pasta water

Parmesan or Romano cheese for garnish

Boil water for the pasta, salt and cook the pasta according to directions, usually around 11 minutes.  Reserve 2 ladles of the water, drain the pasta and set aside.

Heat oil in a large skillet.  Add the mushrooms and onions and cook until onions are soft.  Add the garlic, fennel, tomatoes and butter.   Continue to cook for about 5-6 minutes on medium high heat, stirring to mix the flavors.  Add the bread cubes.

Add the drained pasta to the skillet, along with the pasta water.  Mix thoroughly.  At this time you can add some cheese to the mix.  Serves 4 hungry adults!


Sunday, July 24, 2011

July Pasta of the Month - Garden Pesto


When you think of pesto, it's traditionally prepared using fresh basil and pine nuts.  For some reason, though, I have trouble growing basil in my garden.  This year I decided to grow radishes, mostly for the peppery crunch that it brings to salads.  What to do with all the leaves?  While I know beet tops (greens) are edible and quite good, I wasn't sure about radish tops.


Barely out of the ground!
After doing the research to make sure I wouldn't be poisoned, I stumbled upon a recipe to follow from "Chocolate and Zucchini" blog.  I changed some ingredients (to make it mine) and the results were great!   I added some shrimp and dinner was served!  Definitely worth a try and you can make different variations such as parsley or tomato pesto, too!

2 large handfuls of radish leaves, stems removed and cleaned

1 -2 oz grated cheese.  I used Parmesan.

1 oz of nuts.  I used pecans

2 cloves of garlic, roughly cut

1 Tbsp lemon zest

2 Tbsp olive oil

salt, pepper or red pepper flakes can be added to your taste

Place all the ingredients into a food processor and pulse a bit.  Scape down the sides, and pulse again.  It will be thick.  You may want to add more oil for your taste.  Add to pasta.  I sauteed a few shrimp in a butter/olive oil mix and added them before tossing the pasta.  This pesto works well with rotini because it coats every swirl.  So good!

I used 1/2 recipe for pasta.  I put the rest in the freezer for a later date.  Thaw and add a drizzle of oil when ready to use. 

Thursday, June 23, 2011

From Sorrento with Amore - Pasta of the Month


Do you ever travel in your daydreams?  One of the scenes in my mind is to rise one morning, throw open the rustic wooden shutters and find myself staring into the deep blue waters of the Tyrrenian Sea.  The morning sun climbs higher and sparkles across the sea like small diamonds.   The intoxicating lemon scented air surrounds me.  Throwing on some clothes, I wander down to the street where I will be greeted with a warm cup of espresso.

The fishermen are beginning to dock and unload their catch.  When I finish my "wake up" beverage, I begin my ritual at the pasticerria.  I buy some creme filled cannolis for later, as well as a just baked loaf of bread encrusted with rosemary and olives.  This will go nicely with my lemon infused pasta.  I continue down the trellised path surrounded by magenta colored bougainvillea.  Bright terracotta urns filled with hot red geraniums line the street.  Each step beholds a beautiful sight.

It's just a dream, but I know dreams do come true!  I've only been to Sorrento through pictures and travel brochures, but I'm sure its as beautiful as they say.  I will visit someday! 

As June is rapidly coming to an end, my pasta of the month is a lemon infused angel hair pasta.  So lemony but light, and simple to make.  You don't have to be in Sorrento to enjoy the bounty of the region.

Ingredients:

Serves 4

1/2 box angel hair pasta

olive oil

1/2 shallot or onion, sliced

3 garlic cloves, minced

a handful of parsley, basil and lemon verbena, roughly chopped

1/2 lemon, juice squeezed

2 ladles of pasta water

2 Tbsp Parmesan cheese

1 Tbsp lemon zest

In a large pot boil water for pasta and cook according to directions.  Reserve at least 2 ladles of the pasta water before draining.  In a large skillet, cover the bottom with olive oil.  Add the shallot, garlic, parsley, basil and lemon verbena.  (If you don't have verbena you can use a little more lemon zest, juice or lemon thyme might be an interesting variation.)  Cook on medium only until shallots soften.  Add the lemon juice, drained pasta and ladles of pasta water to moisten.  Mix thoroughly, garnish with Parmesan and lemon zest and serve immediately.  Hopefully, this will transport you to the villa in Sorrento...